Not too long ago a friend and I tried one of the better restaurants in Houston, TX (Pass and Provisions), and I was joyfully surprised to be served water in up-cycled glasses made from old wine bottles. I have never found a good use for old wine bottles and generally feel very wasteful recycling them. Being that wine and upcycling are right up my alley, I started researching how to create these glasses myself.
First, I purchased the Diamond Tech Crafts G2 Bottle Cutter (~$17 on Amazon). From what I read, this seemed to be the most reliable product for creating clean breaks in the glass. There are a few YouTube videos that help tremendously. The jist of it is: you etch one line in the glass using the apparatus to get a very straight line. Then you alternate between hot and cold water baths until the bottle breaks along the etched line. I used a bucket filled with ice water and a tall pot on a light simmer on the stove.
It was pretty simple to follow the instructions on the bottle cutter to get a nice etched line. Then I would hold the bottle by the neck and alternate it between the simmering pot and the ice bucket at 30-second intervals. However, I had a very low success rate when putting the bottle in hot and cold water. The bottle tended to break at other points. Often, it was the very base that would fall right off before I got the bottle to break along the etched line. Since my etched line was somewhat high on the bottle (for tall glasses), I also tried laying the bottle and spinning it in a wide pan of boiling water.
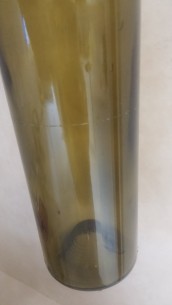
In the end, what I found to be the best technique is: submerge the bottle to at least an inch above the etched line in the boiling water pot for a solid 30-40 seconds. Then lift the bottle out and submerge it in the ice bucket with minimal time exposed to the air. Leave the bottle in the ice bucket 30-40 seconds, after which you should see a crack all the way around where the etched line is. If you don’t see the crack or if it is only partially around, you may need one more dunk in the hot water. However, at this point there is a low chance of success. If you see the crack all the way around the perimeter of the bottle, slowly lift it out of the ice bucket and let the weight of the bottle cause the separation. You can provide a little assistance and pull the two segments of the bottle apart, and it will naturally break nicely along that line.
I found that if I did any more hot/cold treatments, my bottle would tend to break at some point of highest vulnerability. I also found that if I ran the hot/cold water over the crack like some recommend (rather than submerging it), I didn’t get enough temperature change to cause a crack.
If you’re worn out at this point, we are just getting started! Yes, it is a labor of love. When you have your glasses, they are very sharp at this point. You’ll need to sand them down real good before you put your lips on the edge of the glass. Emery paper is best, but sandpaper works also and an electric sander makes it easier. I did this manually at first and it took a really long time. If you can use an automatic sander to get the bulk of the rim sanded (120 grit works well), then you’ll just touch up any deeper crevices and a 45 degree angle on the inside and outside of the rim manually. I wore a mask, goggles, and gloves to prevent small shards of glass from getting in my skin, lungs, or eyes. It is definitely an outside project.
Because of the time required and the low cost of manufactured glasses, this is not the kind of thing you do to save money or generate income. It was rewarding for me to find a use for wine bottles that would otherwise be minimally recycled. What I mean by that is, in many cities there is no way to recycle glass at a positive net energy balance. Many “recyclers” just crush up the glass for landfill cover material or mix it with aggregate for road paving. One can barely call this recycling.
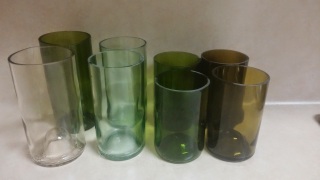
The glasses can be charming and I found it best to try to coordinate sets of matching colors.
A set of completed glasses. Notice there are two different sizes and several different colors.


